About Me

Showing posts with label SEAFOOD. Show all posts

Wednesday, August 10, 2011

Boyfriend made me sushi

I am continually amazed by Boyfriend.  As I'm sure you could have guessed, I am usually the cook in our house.  However, a few months ago we took a sushi-making class together.  I assumed that I would rock the class, and end up adding sushi-making to my culinary repertoire.  

It feels good to be wrong.  It tastes good to be wrong.

Boyfriend was a natural.  I was terrible.  I blame my tiny hands.  I have miserably tiny hands.  Like a 4 year old's hands.  I wish I was kidding.
I call him, "Big Hands"

 I'm telling you what, I'm really looking forward to years of sushi.  Actually, I think that what I'm really looking forward to is the occasional night off from cooking!
Philadelphia Roll - Smoked salmon, cream cheese & cucumber
We had quite the meal.  He was on a roll... get it?  On A Roll!  Get it?  
Seven rolls in total
Smoked salmon (right) and a jumbo roll (left)
Spicy salmon with carrot and cucumber
Another shot of the Philly roll
As you can imagine, we could not possibly eat seven rolls between the two of us.  Boyfriend had sushi for lunch the next day.  Happy problem.

Sunday, August 7, 2011

Martha's Vineyard Vacation

 Boyfriend and I just got back from a week on Martha's Vineyard.  It was a wonderful (and much needed) vacation with lots of food, family, and rose'.

oh.

and one other thing.

LOBSTER
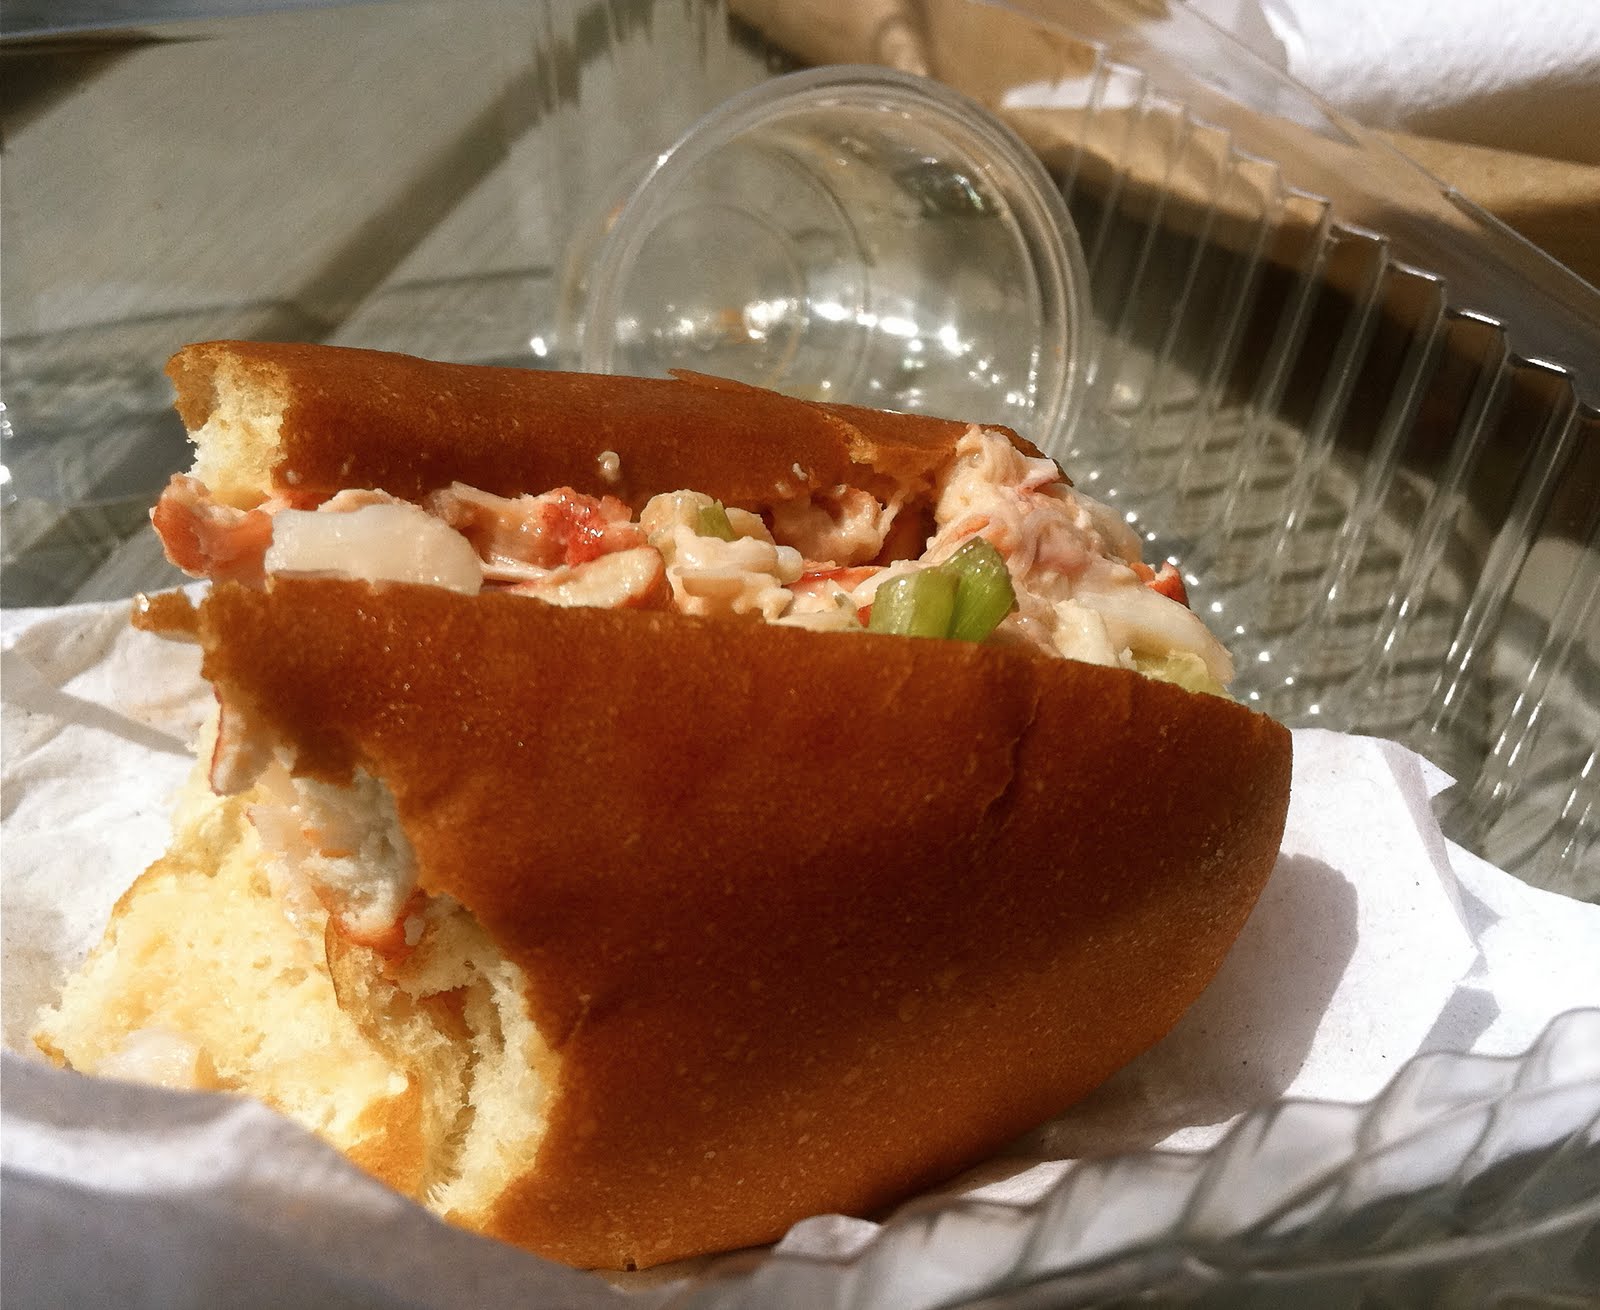
Amazing buttery hot lobster roll
Fresh, delicious lobster.

We drove out to Menemsha one afternoon and hit up the fish market for some lobster rolls.  They had two options - hot and cold.  We got both.

Obviously.

And lobster bisque.

What?  Don't judge.

They were both delicious, but I tend to favor the hot lobster rolls.  Nothing but lobster and butter on a top-split hot dog bun.  The cold lobster roll is the more traditional version, very little mayo or celery or other unnecessary fillers.  Also delicious.  See for yourself.
Traditional cold lobster roll

Wednesday, March 16, 2011

Ceviche with Spanish-inspired Papas Rellenas


Talk about "just in time"... This recipe from The Daring Cooks hit my apartment right when I needed it the most.
"Kathlyn of Bake Like a Ninja was our Daring Cooks’ March 2011 hostess. Kathlyn challenges us to make two classic Peruvian dishes: Ceviche de Pescado from “Peruvian Cooking – Basic Recipes” by Annik Franco Barreau. And Papas Rellenas adapted from a home recipe by Kathlyn’s Spanish teacher, Mayra."
Boyfriend and I just got home from a BEAUTIFUL wedding in Miami. Get ready to become very jealous (if you live in New England anyway):


Yes, you're seeing that right, I got a wee bit o' sun before the nuptials

Oh how I miss the sun, warmth, sand, and pimped out cars.  Now, to be completely honest, and most of my friends know this about me, but Florida is very high on my list of hated states.  "America's Wang" I used to call it (snerk!).  Don't ask why, just trust me, I have my reasons.

But this trip to Miami was just in time as well.  It felt so nice to pull on my shorts and have them actually fit. We are just barely starting to thaw out here in the Northeast, but all that means is that temperatures are hovering between 30 and 45F.  "Thaw" and "warm" (or "Spring" for that matter) are definitely not the same thing up here as they are in other parts of the US.


Ceviche de Pescado (serves 2)
1 large tilapia fillet, cut into 1/2" cubes
1/2 lb shrimp, shelled and deveined, cut into 1/2" dice
2 garlic cloves, minced
1 jalepeno pepper, minced
juice from 7 limes, freshly squeezed (squoze?)
juice from 1 orange, freshly squoze
4 cubes of Trader Joe's fresh frozen cilantro (or used ~1 tbsp fresh if you have it), finely chopped
salt and pepper, to taste

For Garnish: lettuce and Salsa Criolla (recipe below)

First, make the marinade/cooking liquid for the fish. 

1) Force Ask Boyfriend to juice the limes and oranges for you.  He has bigger, stronger hands and hey, its the least he can do while you're prepping dinner and he's watching ESPN SportCenter.

2) Add the jalepeno, garlic, cilantro, salt and pepper to the citrus juice and add you seafood to the mixture.  Try to pick a container that will allow the seafood to be completely covered by the juice.  The directions say to give it 10 minutes.  My fish was still pretty raw at that point so I just let it go until dinner was ready.  All in all, about 1.5 hours.  And even after that, I still wasn't 100% sold on the half-cooked half-raw mixture, so I zapped it in the microwave for a minute.  Sue me, but I'm too busy to take any food poisoning risks.  I'm sure if it was sushi-grade fish I would have been less nervous.

3) Make the Salsa Criolla.  Let it macerate for at least 30 minutes or as long as you need before dinner is ready.  It will last in the fridge for a day or two if you want to make it early.

Salsa Criolla
1/2 medium red onion, sliced very thinly in half-moon shapes
1 small jalepeno, diced
1 tbsp vinegar (I used rice vinegar because its all I had, but white would work fine)
juice from 1 lime
salt and pepper, to taste

1) Soak the onions in cold water for about 10min to remove some of the bitterness.  Drain.
2) In a small bowl, combine the onions with the rest of the ingredients, season, and let sit at least 30min or until you're ready to use them.

To plate: 

The next part of this wonderful dinner was to make Papas Rellenas. 

Boyfriend's first words were, "Sooo, what does that mean?"

L: "Well," I reminded him, "remember when I made Chiles Rellenos?"
B: "Yeah, yum."
L and here goes me being a teacher: "Ok, so what were those made of?"
B: "Stuffed, battered chiles... get to the point!"
L: "Right, so if 'papas' means 'potatoes', what would you guess 'papas rellenas' means?"
B obviously annoyed with me for being so patronizing: "GOT. IT. (grumble)"

So the point of that little exchange was to say that yeah, Papas Rellenas means basically, stuffed potatoes.
This part of dinner took me a lot longer than it should have, and I'm not even sure why.  None of it is particularly difficult.  I made quite a few changes to the original recipe, which made my papas rellenas more "Spanish" than "Peruvian".

First, I decided to use a mixture of sweet and russet potatoes for the dough.  I thought that the sweet potato would lend a little sweetness (and nutrients) to the final dish and contrast nicely with the sour notes in the ceviche.  Instead of the typical ground beef, raisin, and olive filling, I used chorizo (soy-rizo since we're honest on this blog), kalamata olives, and marcona almonds as the base flavors.

Papas Rellenas
For the dough:
1 large sweet potato
1 medium russet potato

For the filling:
1 tbsp olive oil
1/2 C Trader Joe's Soy-rizo (use the soft-style chorizo if you can't get the soy version)
6 kalamata olives, roughly chopped
2 hard-boiled eggs, roughly chopped (from my CSA farm.... soooo yummy!!)
3 tbsp crushed marcona almonds (toasted)
1 small onion, diced
2 cloves garlic, minced
1 jalepeno, minced
2 tsp cumin
pinch cinnamon
2 tsp smoked paprika
1/4 C dry white wine
salt and pepper

For the final prep:
1 egg, beaten with 1 tbsp water
1 C flour
1 C bread crumbs (I used panko, but any unseasoned ones would work)
oil, for frying

1) I decided to roast my potatoes for 30min in a 400F oven to try and get rid of as much moisture as possible.  I think boiling them would have been easier and I'm not sure we would have noticed a huge difference in texture.  Do whatever floats your boat, you are basically making "mashed" potatoes when then are done, just don't add any butter or milk.  Let the mashed potatoes cool in a bowl while you prep the filling.

2) In a medium skillet, heat 1 tbsp olive oil and add the onion garlic and jalepeno.  Cook over medium heat for about 5min or until the onions start to turn translucent.
3) Add the chorizo and brown for a couple minutes.
4) Add the cumin, cinnamon, and paprika, stir to combine.  Let this cook for about 2-3 minutes more.
5) Add the white wine to deglaze the pan, scraping up all the bits stuck to the bottom of the pan.
6) Add the olives, cook for another minute or so, then remove from the heat and fold in the hard boiled eggs and marcona almonds.
7) Let the filling cool while you get everything ready to make the "papas".  Add an egg to the potato dough and mix well.  Here's the line-up for preparing the final dish:
8) Make a flat, round "patty" in your hand using the potato dough, then put some of the filling in the middle and carefully fold the potato around the filling, making a ball where the inside is all filling and the outside is all potato.  This was not as easy as I thought it would be, but not impossible.  I'm sure with more practice it wouldn't be nearly as challenging.
9) Once you've made the papas ball, drop it in the flour and coat, then into the egg mixture, then into the breadcrumbs.
Papas ready to go into the fryer
10) Heat an inch of vegetable oil in a skillet to 350-375F. 
11) Fry the papas (in batches if necessary), rotating, until the entire outside is golden brown and delicious.  Drain on paper towels.
To serve, I put down a bed of lettuce and topped it with the Ceviche and some Salsa Criolla.  Place a Papas Rellenas and a wedge of manchego on the side (because originally it was supposed to go in the filling but OOPS... I forgot).
This was so refreshing and a nice throw-back to our weekend in Miami, especially since it was gray and gloomy back here in Boston.  If I wasn't in the middle of detoxing from said vacation I think a Mojito or dry Rose' or crisp beer would have complemented this very nicely.  Next time.  And yes, there will definitely be a "next" time for the ceviche since it was SO EASY and SO DELICIOUS.

Tuesday, February 15, 2011

Cold Soba Noodles and Veggie Tempura

The February 2011 Daring Cooks’ challenge was hosted by Lisa of Blueberry Girl. She challenged Daring Cooks to make Hiyashi Soba and Tempura. She has various sources for her challenge including japanesefood.about.com, pinkbites.com, and itsybitsyfoodies.com
When I was a vegetarian, every time we would go to a Japanese restaurant for lunch or dinner, I would always order tempura vegetables.  I loved them, especially the sweet potatoes.  I was always curious how they cooked the vegetables perfectly encased in a crunchy, slightly fluffy batter.  Ohhh, and with the dipping sauce... om nom nom.  The eternal trick was always trying to bite a large piece of sweet potato or zucchini in half, after dipping it in the sauce, while tenuously holding it with your chopsticks.  And trying not to dribble the sauce ALL. DOWN. YOUR. CHIN.

Minds out of the gutter people.

Clockwise from the top: snap peas, sweet potato, shrimp,
mushrooms, and red bell peppers in the middle
I was so glad that tempura was part of the challenge this month because I may have never tried it otherwise.  Not nearly as hard as I anticipated.  (that's what she said!).

Great, now you've really got me going.

Moving on.

The directions in the challenge were spot-on and I felt that luckily, my chopstick-skills were up to snuff.

For the Soba:
12 oz Soba (buckwheat) noodles
2 qts water

1) Cook the noodles in a pot of boiling water, approx 7-10min, read the package.  Wow, that was easy wasn't it?
2) Once they are done, drain the noodles and rinse under cold water to cool and remove the extra starch.  Keep them in the colander covered by a damp towel until you're read to use them.


Mentsuyu (the noodle sauce):
2 C Kombu dashi (I just heated some nori in hot water and then filtered it, lazy me)
1/3 C soy sauce
1/3 C mirin (sweet rice wine)

1) Put mirin in a sauce pan and heat gently.  Add soy sauce and the dashi soup stock (or if you're lazy like me, the nori soup stock).  Bring to a boil.  Take off the heat and cool.  Refrigerate until ready to use.

Tempura
1 egg yolk
1 C iced water
1/2 C flour, plus extra for dredging
1/2 C cornstarch
1/2 tsp baking powder
vegetable oil, for frying
ice water bath, for the batter
cold, sliced vegetables/fish:

  • sweet potato, peeled, sliced and blanched
  • carrot, peeled, sliced
  • green beans
  • snap peas
  • bell pepper, sliced
  • mushrooms
  • eggplant, sliced
  • zucchini, sliced
  • shrimp, shelled

1) Place ice water in a mixing bowl.  Lightly beat the egg yolk and gradually pour into the iced water, stirring (with chopsticks!) and blending well.  Add flours and baking powder all at once, mix with the chopsticks until loosely combined.  The batter should be runny and lumpy.  Keep the batter cold by placing it in the ice water bath.
2) Heat the oil in a large, deep frying pan (320F for veggies, 340F for seafood).
3) Starting with the veggies, use your chopsticks to grab a veggie, then dip it into a shallow bowl of flour, then into the tempura batter.  Slide the veggie into the hot oil, trying not to overcrowd the pan and drop the temperature of the oil.
4) Place the finished tempura pieces on a wire rack or paper towel to drain. 
5) Continue frying the other items, frequently scooping out any bits of batter to keep the oil clean.
6) Serve immediately with dipping sauce (recipe below)

Spicy Dipping Sauce:
3/4 C soy sauce
3/4 C scallions, finely chopped
2 tbsp rice wine vinegar
1/2 tsp sugar
1/4 tsp English mustard powder
1 tbsp vegetable oil
1 tbsp sesame oil
salt and pepper, to taste 
2 tbsp water

1) Put all the ingredients in a covered container.  Close the lid and shake the S^&T out of it until the solids (sugar, salt, mustard) are dissolved.  Add and shake in the water and re-season if necessary.


Serve the tempura and soba noodles for dinner.  Pat yourself on the back for making something that seemed so hard and was actually quite easy.  Pop open the special bottle of saki that you bought just for this occasion and make a toast.  To Soba!  To Tempura!  To Laura!

    Sunday, January 30, 2011

    Sole with Seafood Stuffing in a Lime-Cilantro Broth

    I don't even know how to write about this because it was so good.  Literally, we ate slowly, savoring every bite, and were still left wanting more!!  We were full, sated, and wanting, begging, for more.

    Too bad.

    My Mom (being the awesome person she is) has sent me a case of meat from Omaha Steaks for the past 2 Christmas'. Say what you will about online meat purveyors, but Boyfriend and I can use all the free food you can throw at us.  I try very, very hard to purchase sustainable, local food with my own money (yeah CSA!!), but I'm not going to deny a gift, especially not a gift of meat.

    This year we got a couple Stuffed Sole Filets along with some pork chops, beef tenderloins, and hamburgers.  I was in the mood for something healthy and crisp, so I decided to bake the Sole in the oven and serve it in a lime-cilantro broth with roasted cauliflower.


    Ingredients:
    Stuffed Sole
    1 tbsp butter
    1 onion, diced
    1 celery rib, diced
    2 garlic cloves, crushed
    1 tbsp ginger, fresh grated with juice
    5-7 cilantro sprigs
    2 tsps red pepper flakes
    2 tsps chinese 5-spice powder
    zest of 1 lime and juice
    1/2 C white wine (I used Gewurztraminer)
    1/4 C Asian fish sauce
    2 C water
    salt and pepper, to taste

    To make the broth:
    1. In a large saucepan, heat the butter and add the onion, celery, garlic and ginger.  Cook until softened (5-7min).

    2. Add the cilantro, red pepper, chinese 5-spice powder and lime zest and cook for 1-2min.
    3. Add the wine and cook over medium heat until reduced by half.
    4. Add the fish sauce, lime juice and water and bring to a boil.
    5. Turn down the heat to a simmer, and let the flavors develop for about 15min.

    6. Strain the broth into a small saucepan and taste for seasonings.  Add salt and pepper if needed.

    To make the fish and cauliflower:
    1. Set the oven to 375F and place the frozen stuffed sole onto a foil-lined baking sheet when the oven is ready.  Bake for 40min.
    2. Toss cauliflower florets with olive oil, salt and pepper and put into the oven (on a baking sheet) for 20-30min, depending on how crispy you like them.  Boyfriend likes his roasted veggies to have burnt edges so we err on the longer cooking times.

    To serve:
    Place the cooked sole in the middle of a bowl and pour the lime-cilantro broth all around it.  Serve with roasted cauliflower on the side.

    If you want to make this a little more hearty, I think it would be great over rice as well.

    Thursday, January 27, 2011

    Lobster Mac n' Cheese

    Decadent?  Yes.  Within my New Year's Resolution to cook healthier?  Not in the least.  The good news?  I made this in December 2010 so it doesn't count against me.  Muwah-ha-ha!

    Thank God lobster grows in New England, making it relatively less expensive than if I were living in, say, Kansas.  I say "relatively" because lobster is still considered a luxury here, but I managed to get a pound of lobster claws and meat for $7.99 and I don't care where you live, that's a steal!  Especially since I didn't have to deal with the steaming/cracking/picking/time consuming part of it.

    Ingredients (serves 2 plus leftovers):
    1/2 lb Campanelle pasta
    4 C 1% milk, room temperature (look at me, tryin' to be healthy n' stuff)
    1/2 stick (4tbsp) of butter (just kidding!)
    4 tbsp flour
    1 C shredded Cheddar cheese
    1/2 C shredded Fontina (only because I had a hunk of it getting old in the fridge)
    1/2 lb lobster claw and tail meat, cooked
    1 tbsp chopped fresh tarragon
    Zest of 1 medium-sized lemon
    pinch of nutmeg
    salt and pepper, to taste
    1/2 C panko-style bread crumbs
    1 tbsp extra-virgin olive oil

    1. Start boiling water for the pasta, don't forget to salt it!
    2. Preheat the oven to 375F.
    3. Make a bechamel sauce:  Heat the butter until it is melted but not browning.  Add the flour to the butter, whisking the whole time, and cook it for about 5-6 minutes, or until it is a light, golden color.  Add the room temperature milk (you can also heat the milk over a low flame to speed this step up a little), and continue to whisk until the sauce is thick enough to coat the back of a spoon.
    4. Remove the bechamel from the heat, and add the shredded cheeses, lobster meat, salt, pepper, lemon zest, tarragon and nutmeg, stirring to incorporate and melt the cheeses.
    5. Toss the al dente pasta with the cheese/lobster sauce, then pour it into an oven safe dish.  I used little individual gratin dishes.
    6. Mix the bread crumbs with the olive oil and sprinkle them over the top of the pasta.
    7. Bake for 20-30min, or until the sauce is bubbly and the pasta/bread crumbs are browned on the top.

    I chose a 2008 Chardonnay to serve with this because I thought a medium-bodied, slightly oaky and acidic Chardonnay would help cut through the richness of the dish.  I chose wisely. 

    All in all, this dinner was pretty easy to make and felt very luxurious for a weeknight meal.  I would definitely do it again for a dinner party or if I was trying to impress people.

    Tuesday, November 2, 2010

    A Locally Grown Feast


    First, I'm sorry I haven't been posting much lately.  I've been traveling a TON, work has been crazy busy, and, to top it off, my home computer totally bit the big one.  I've been cooking some super fun stuff... just haven't had time to upload any of it.  So, hopefully, this post will be the beginning of good things to come :)


    And here we go (again on my own, goin' down the only road I've ever known!)  Now that I've song-poisoned you... here we go:


    I'm so sad now that my CSA season has come to a close. Because of all the travel this summer, I really missed the experience of walking to pick up my veggies every Sunday morning.  Luckily for me, my awesome roommate came to the rescue so I only had to miss 2 pick-ups all season.  However, now that its all over, I find myself hoarding winter squash and potatoes, knowing that they will store the longest and provide me with some lingering joy knowing that they were grown so close to where I live.


    That said, I'll need to cook them up at some point.  I can't go hoarding them forever.  I made a delicious roasted butternut squash and ginger risotto a couple of days ago (forgot to take a picture... bad food blogger!) but had the neck of my beautiful butternut squash left, all alone, in the fridge... there are only 2 of us and that was one big squash.


    Now, Boyfriend as I've mentioned, isn't the biggest squash fan.  Butternut is an easy one though because it's pretty sweet and the texture isn't as mushy as long as you don't cook it forever.  With that in mind, my first inspiration was to make a butternut and potato gratin.  I wanted to break up the sweetness and squashy-ness with some nice starchy potatoes (which I've also been hoarding).


    A layer of potatoes, layer of squash, repeat.  Salt & pepper, cover with foil and bake for 30min in a 350F oven.  Uncover, pour some light cream over the top and bake uncovered for another 15min or so until the cream is thickening and bubbling.  Top with some panko and dots of butter, toss under the broiler, and done.  Easy peasy (well... more about that later... wait for it...).

    As for the other part of our "local" feast.  Well, there's a nice story associated with that one.  However, I will warn you, I was recently told that my stories run a little long these days.... I think the phrase I heard all weekend was “Land the plane, Laura... Land. The. Plane”.  
    A-N-Y-W-A-Y....
    I was down in the North End buying ground lamb (for euprika, see here) when on my walk back to the T I wandered across Mercato del Mare.  I’ve been to Mercato del Mare before, I love it.  Small little local seafood monger.  Most amazing owners ever (Woot Woot! Keri and Liz!!).  Ever. I popped in with a simple question, “Hey, are you guys still doing those free oyster shucking lessons on Saturday?”
    Keri: “Yeah, definitely."

    "Great, I'll try to make it down this weekend."

    K: "Well, hey, I mean, are you busy now?”... 

    “Well.... no”

    K: “Well, c’mon in then!  I’ll make (name) show you how to do it”  *meanwhile, (name) is wearing a lobster on his head... fan-&*%-ing-tastic!*

    “Really?!?  Awesome!”
    And that’s how I learned to shuck oysters.  
    Oh.... wait....
    That’s not really important right now is it?  OK, here’s the important part, I felt so at-home and happy that I also bought a pound of fresh-off-the-boat bay scallops.  It was a kickass day, I got some fresh ground lamb, learned to shuck oysters, and picked up some nice local scallops.  Happy day!

    My impromptu dinner was slowly coming together.  
    Local scallops, seared (in butter, obv) with sweet potato gratin and a nice salad.


    The scallops were unbelievably good (the butter might have had something to do with that... just a little something) and the gratin turned out significantly better than I thought since I totally burned the panko topping under the broiler because I wasn't paying attention and wine may or may not have been involved let's just leave it at that.


    In fact, I believe this gratin might make an appearance on the Thanksgiving table this year....

    Thursday, October 14, 2010

    Clam Chowder, The Black Pearl Style


    Last summer Boyfriend and I went to a wedding in Newport, Rhode Island.  I hadn't ever been there before and let me tell you... it was AMAZING.  The mansions.  The ocean.  The Black Pearl's World Famous Clam Chowder.

    Now, there was a lot of hype leading up to this bowl of chowder.  A. LOT.  I was prepared to be disappointed actually.  Don't get me wrong, I love clam chowder.  Every time people come to visit I make sure they get 2 things - clam chowder and a lobster roll.  Its New England for god's sake!

    However, I have to admit....

    It was shut-your-mouth-smack-your-mama-I-refuse-to-share GOOD.  I had not, and since have not, had chowder this good ever.  It's not super-thick they way I normally see it here and it had lots of dill and a hint of booze... maybe sherry?  I wish I could have brought some home with me.  I should have.  Although... I'm not 100% convinced it would have made the 2 hour trip back safely.  I mean, hell, we still had a wedding to go to and there was no way that chowder would have survived our state of debauchery.  4am drunk and hungry?  No. Way.

    I've never actually made clam chowder before so I figure hey, why not tackle the most amazing, unreproducible chowder ever?  Why not?


    Ingredients

    1/4 stick of butter
    4 slices of bacon, chopped
    1 small onion, chopped
    4 medium potatoes, peeled and diced into smallish cubes
    2 cans of minced clams, with juice
    2 cup light cream
    2 cups milk (I used 1%)
    2 shot glasses dry vermouth
    2 tsp dried parsley
    1 tbsp cracked black pepper
    2 tbsps dried dill weed, or more to taste

    Cook the bacon until nice and crispy.  Add the butter and chopped onions to the bacon/grease and saute until the onion is starting to soften. Add the parsley, dill, clam juice, and potatoes, and just enough water to cover all ingredients. Simmer 15-20 minutes until potatoes are cooked but not mushy.  Add the cream, milk and vermouth. Heat just a little more so the cream does not cool it. Add the minced clams when you're almost ready to serve it to make sure they don't get too tough.  Taste.  Season. Taste again.  *Note: if you like your chowder a little thicker you can either make a roux using flour and butter or mix a little cornstarch with water and add that to your chowder before adding the clams and let it thicken your chowder.

    I had this for lunch the next day and I have to say, it re-heated very very well.  Boyfriend liked it but said he would have added more dill and less potatoes.  Also that there wasn't any bacon in the original Black Pearl chowder.  Whatever.  I thought it was f-ing delicious and my favorite chowder recipe so far.  I might toy with it in the future... add fresh clams instead of canned, etc etc.... but I think this is the only style of chowder I plan to make for a long, long time.

    Wednesday, September 22, 2010

    Fettuccine with Shrimp in a Tomato, Olive, and Feta Cream Sauce


    I had a revelation this weekend... fresh pasta is SO. MUCH. BETTER. than the dried stuff.

    During prime tomato season on the farm, I oven-dried a bunch of tomatoes with whole garlic cloves and thyme, then let them marinate in olive oil and fresh-from-my-herb-garden basil for about a week.  Oven-drying tomatoes isn't hard, it just heats up your kitchen and takes a couple hours.  Store-bought sun-dried tomatoes packed in olive oil would be a great substitute.

    And this dish is super-fast.  I mean, seriously, it was ready in T-minus 20min.

    INGREDIENTS
    1 pkg fresh fettuccine
    1/2 lb shrimp
    1 tbsp butter
    1 tbsp olive oil
    2 cloves garlic, minced
    1/4 C dried tomatoes (oil-packed), roughly chopped
    3 tbsp oil-brined black/kalamata olives, roughly chopped
    1/2 C greek yogurt
    1/4 C crumbled feta cheese
    3 tbsps chopped herbs, I used mint and basil from my herb garden
    sprinkle of crushed red pepper, optional
    These are, of course, estimates in measuring... use your eyes and tastebuds as a guide.

    1) Bring a large pot of salted water to a boil.
    2) Melt butter and olive oil in a large skillet over medium-high heat.  Add shrimp and cook until just barely done (2min per side?).  Remove shrimp and put to the side.
    3) Add the garlic and tomatoes (with oil) and optional red pepper to the previously shrimp-y pan and heat through over med/med-low heat. 
    4)  When that's all nice, warm, aromatic and incorporated, add the yogurt and olives.  Let this simmer on a low burner while you cook the pasta. And that's the great thing about fresh pasta, it only takes 3-4min MAX.
    5) When the pasta is al dente, add it to the sauce skillet with ~1/4C starchy pasta liquid.  
    6) Add the shrimp and 2 tbsps chopped herbs.
    7) Stir, mix, smell.  It should come together into something magical.
    8) Top with crumbled feta.  Give it one more mix and serve, sprinkled the the remaining tbsp of mint/basil.

    This dinner turned out better than I could have ever expected considering I made it up on the fly with ingredients sitting around in my fridge.  I hope you find time to try some fresh pasta, it really does make a dramatic difference.

    Mangia!
    Look how GREAT my mint and basil is doing!!

    Thursday, July 22, 2010

    Melon Soup with Crab

    This might not be shocking to most, but we are going through one hell of a heat wave.  According to the US National Oceanic and Atmospheric Association, 2010 is set to be the hottest year on record... world wide.  The northeast has been hit especially hard, with temps in Boston, New York and Philly topping 100F in early July.  And it hit 129F in Pakistan in June... [political side note: why exactly are we there again?]

    Since my roommate and I have decided to ban the use of the stove (we don't have A/C and it is all kinds of miserable in my apartment), I wanted to make something cold and refreshing for dinner, something that required no cooking and, thankfully, no stove.

    The melons were on display immediately upon entering the grocery store.  Its obvious I'm the only one craving cold, watery fruit.  The cantaloupe smelled divine so into my basket it went.  I had bought some crab from the Asian grocery store a few weeks ago (frozen) so decided to try and put these two things together and make something delicious out of them.  Melon + Crabs = Very summery.

    Ingredients (4 servings): 
    1 shallot, finely diced
    2 tbsps chives, diced
    2 tbsps lemon juice (I used the juice from one lemon, which I assume is roughly 2 tbsps)
    2 tbsps extra virgin olive oil
    2 tbsps greek yogurt
    2 tsps dijon mustard
    1 lb crab meat (I highly recommend using fresh if you can)
    1 ripe cantelope, peeled and diced into 1" cubes
    2-3 tbsps honey or simple syrup, depending on the sweetness of your melon
    salt and pepper
    champagne (optional)

    Step 1: Prep the shallot and chives
    Step 2: Mix together the shallots, chives, and next 4 ingredients (lemon, oil, yogurt, mustard) and season if it needs it.  Gently fold in the crab, trying not to break it up too much.

    Step 3: Add the cubed melon, 1 tbsp lemon juice, and your sweetener of choice (honey, sugar, etc) to a blender and hit "Puree"


    **look how sweet and juicy this melon is!!  Yay!!


    Step 4: Assembly (and booze addition if you're so inclined).

    Mound the crab mixture into the center of each bowl.  Pour the melon puree around it, and garnish with chives. 

    *Optional* If you a big fan of food-wine pairings, as I am, mix 1/2 C of champagne into the pureed melon before adding it into the bowls.  The chammers gives the soup a little more depth and bubbles.  Yeah, that's right, I got really excited about bubbles in my food.   I am 5 years old.
     
    I liked this soup, it was very different, but if I ever made it again I have big changes in mind.  First of all, I think fresh lump crab meat would have done wonders for this dish.  The frozen stuff from Super88 really didn't have the flavor or texture I was looking for.  I admit that I'm a bit of a crab snob seeing as I grew up on the Chesapeake Bay and all.  I don't think Boyfriend was a big a fan either.  Again, I think it was the crab.  Also, if I make this again I think I'll add some spice/heat to the crab mixture.  I think hot chilies or ginger would balance the sweetness of the melon and crab nicely.
    Related Posts with Thumbnails